Everyone loves to go on vacation, but many dread their trek through the TSA security check points. Here’s my “top 10 list” for making the process less stressful.
#1 – The most important is to get to the airport EARLY! You have heard me say more than once that “I would rather you have time for a second cup of coffee while you’re sitting at the gate, waiting for your flight, than frustrated and stressed out while you wonder whether or not you will make it through the security screening in time.”
#2 – When you arrive at the security checkpoint have your boarding pass and photo ID out and ready. Children are not required to show identification.
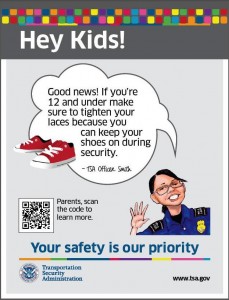
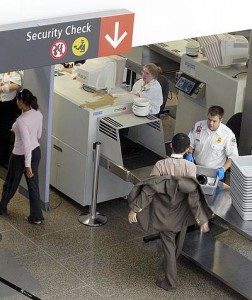
#3 – Dress the part – wear slip on shoes that you can remove and replace quickly without the need to sit down. You can place your shoes directly on the conveyor belt for X-ray, they do not need to be placed in a screening bin. Children get a break here as well, those 12 and under do not need to remove their shoes for screening. Senior travelers, age 75 and up, can keep their shoes on as well.

#4 – Don’t over dress – pack your coats and jackets in your checked bags when possible. If you are wearing a jacket at the security checkpoint it needs to be removed and placed in a screening bin for X-ray inspection.

#5 – Pack an extra zip-top bag in your carry-on for all of the items that you need to remove from your pockets or take off, such as a watch or bracelet, to proceed through the security check point. After you are reunited with your belongings you can pick up the bag and know that you haven’t left spare change, your wallet or even your watch behind.

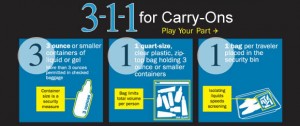
#6 – Know the 3-1-1 – Prepare a 1 quart-sized, clear, plastic, zip-top bag of liquids, pastes and gels before you arrive at the airport. Keep it near the top of your carry-on bag, you will need remove the quart-sized bag to place it in a screening bin for X-ray inspection. Keep in mind that each container of liquid, paste or gel can not exceed 3.4 ounces.

#7 – Medication, baby formula, baby food and breast milk are permitted in amounts exceeding 3.4ounces and do not have to be included in the zip-top bag. These items will go through extra screening if necessary.
#8 – Electronics – when possible don’t pack oversized electronics. Small electronics, phones, iPods, tablets, etc can remain in your carry-on. Larger items, such as laptops or DVD players, must be removed from your carry-on bag and submitted separately for X-ray screening.
#9 – Gifts? Don’t wrap them, you run the risk of having a security officer unwrapping it instead of the intended recipient.
#10 – When in doubt, leave it out! If you aren’t sure whether or not the item in question will make it through the carry-on screening put it in your checked baggage, or leave it at home.
